Vue-CLI学习
vue-cli起步
📚 Vue 学习目录
🚀 Vue.js基础学习 - 📝 Vue.js进阶 - 🎞️ Vue3学习 - 🔦 webpack学习 - 📦 Vue-CLI学习 - 📌 Vue-router学习 - 🔮 Vuex学习 - 🕶️ ElementUi学习(上) - 🚡 ElementUi学习(下) - 🚁 Vue仿蘑菇街项目 - 🌍 Vue响应式原理解读 - 🎀 Nuxt.js 学习
文章中的资料来自:https://github.com/zhangtianyi0110/VueLearnNotes/blob/master/16-vue-cli/16-vue-cli.md
什么是vue-cli
Vue CLI 是一个基于 Vue.js 进行快速开发的完整系统,提供:
- 通过
@vue/cli搭建交互式的项目脚手架。 - 通过
@vue/cli+@vue/cli-service-global快速开始零配置原型开发。 - 一个运行时依赖 (
@vue/cli-service),该依赖:- 可升级;
- 基于 webpack 构建,并带有合理的默认配置;
- 可以通过项目内的配置文件进行配置;
- 可以通过插件进行扩展。
- 一个丰富的官方插件集合,集成了前端生态中最好的工具。
- 一套完全图形化的创建和管理 Vue.js 项目的用户界面。
Vue CLI 致力于将 Vue 生态中的工具基础标准化。它确保了各种构建工具能够基于智能的默认配置即可平稳衔接,这样你可以专注在撰写应用上,而不必花好几天去纠结配置的问题。与此同时,它也为每个工具提供了调整配置的灵活性,无需 eject。
CLI是什么意思
- CLI是
Command-Line Interface,即命令行界面,也叫脚手架。 - vue-cli 是vue.js官方发布的一个vue.js项目的脚手架
- 使用vue-cli可以快速搭建vue开发环境和对应的webpack配置
vue-cli使用
vue-cli使用前提node
vue-cli依赖nodejs环境,vue-cli就是使用了webpack的模板。
vue-cli4.x
安装vue脚手架,现在脚手架版本是vue-cli4.x
1 | ## npm 方法 |
安装完成后使用命令查看版本是否正确:
1 | vue --version |
如果安装失败自行百度解决
vue-cli2.x
官方原文: 拉取-2-x-模板-旧版本
拉取2.x模板(旧版本)
Vue CLI >= 3 和旧版使用了相同的
vue命令,所以 Vue CLI 2 (vue-cli) 被覆盖了。如果你仍然需要使用旧版本的vue init功能,你可以全局安装一个桥接工具:1
2
3npm install -g @vue/cli-init
## `vue init` 的运行效果将会跟 `vue-cli@2.x` 相同
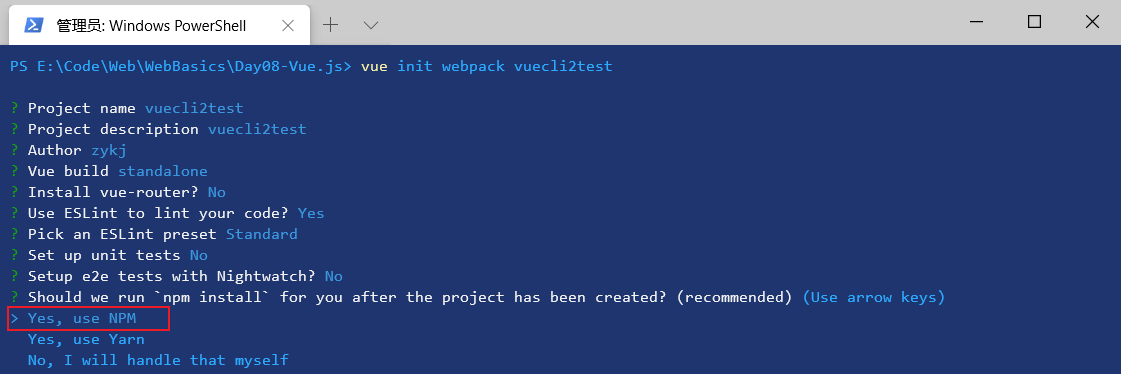
vue init webpack my-project创建工程选项含义

- project name:项目名字(默认)
- project description:项目描述
- author:作者(会默认拉去git的配置)
- vue build:vue构建时候使用的模式
- runtime+compiler:大多数人使用的,可以编译template模板
- runtime-only:比compiler模式要少6kb,并且效率更高,直接使用netder函数
- install vue-router:是否安装vue路由
- user eslint to lint your code:是否使用ES规范
- set up unit tests:是否使用unit测试
- setup e2e tests with nightwatch:是否使用end 2 end,点到点自动化测试
- Should we run
npm installfor you after the project has been created? (recommended):使用npm还是yarn管理工具
等待创建工程成功。
注意:如果创建工程时候选择了使用ESLint规范,又不想使用了,需要在config文件夹下的index.js文件中找到useEslint,并改成false。
1
2
3
4// Use Eslint Loader?
// If true, your code will be linted during bundling and
// linting errors and warnings will be shown in the console.
useEslint: true,
vue-cli2.x的目录结构
创建完成后(由于安装的模块可能不同、文件也不一样):
1 | ├── build 构建脚本目录 |
其中build和config都是配置相关的文件。
build和config
build中将webpack的配置文件做了分离:
webpack.base.conf.js(公共配置)webpack.dev.conf.js(开发环境)webpack.prod.conf.js(生产环境)
我们使用的脚本命令配置在package.json中。
打包构建:
1 | npm run build |
如果搭建了本地服务器webpack-dev-server,本地开发环境:
1 | npm run dev |
此时npm run build打包命令相当于使用node 执行build文件夹下面的build.js文件。
- 检查dist文件夹是否已经存在,存在先删除
- 如果没有err,就使用webpack的配置打包dist文件夹
在生产环境,即使用build打包时候,使用的是webpack.prod.conf.js配置文件。
源码中,显然使用了webpack-merge插件来合并prod配置文件和公共的配置文件,合并成一个配置文件并打包,而webpack.dev.conf.js也是如此操作,在开发环境使用的是dev的配置文件。
config文件夹中是build的配置文件中所需的一些变量、对象,在webpack.base.conf.js中引入了index.js。
1 | const config = require('../config') |
src和static
src源码目录,就是我们需要写业务代码的地方。
static是放静态资源的地方,static文件夹下的资源会原封不动的打包复制到dist文件夹下。
其他相关文件
.babelrc文件
.babelrc是ES代码相关转化配置。
1 | { |
- browsers表示需要适配的浏览器,份额大于1%,最后两个版本,不需要适配ie8及以下版本
- babel需要的插件
.editorconfig文件
.editorconfig是编码配置文件。
1 | root = true |
一般是配置编码,代码缩进2空格,是否清除空格等。
.eslintignore文件
.eslintignore文件忽略一些不规范的代码。
1 | /build/ |
忽略build、config、dist文件夹和js文件。
.gitignore文件
.gitignore是git忽略文件,git提交忽略的文件。
.postcssrc.js文件
css转化是配置的一些。
index.html文件
index.html文件是使用html-webpack-plugin插件打包的index.html模板。
package.json和package-lock.json
- package.json(包管理,记录大概安装的版本)
- package-lock.json(记录真实安装版本)
ESlint 配置
确保安装了ESlint、是一个检查代码错误的
如何关闭?
config->index.js
1 | module.exports = { |
runtime-compiler和runtime-only区别
新建两个vuecli2项目:
1 | //新建一个以runtime-compiler模式 |
两个项目的main.js区别
1 | import Vue from 'vue' |
1 | import Vue from 'vue' |
1 | netder: h => h(App) |
1 | netder:function(h){ |
compiler编译解析template过程
vm.options.template解析成ast(abstract syntax tree)抽象语法树,抽象语法树编译成vm.options.netder(functions)netder函数。netder函数最终将template解析的ast渲染成虚拟DOM(virtual dom),最终虚拟dom映射到UI上。
runtime-compiler: template会被解析 => ast(抽象语法树) => 然后编译成netder函数 => 渲染成虚拟DOM(vdom)=> 真实dom(UI) runtime-only: netder => vdom => UI 1.性能更高,2.需要代码量更少
netder函数1
2
3
4
5
6
7
8netder:function(createElement){
//1.createElement('标签',{标签属性},[''])
return createElement('h2',
{class:'box'},
['Hello World',createElement('button',['按钮'])])
//2.传入组件对象
//return createElement(cpn)
}h就是一个传入的
createElement函数,.vue文件的template是由vue-template-compiler解析。将runtime-compiler的
main.js修改1
2
3
4
5
6
7
8
9
10
11new Vue({
el: '#app',
// components: { App },
// template: '<App/>'
//1.createElement('标签',{标签属性},[''])
netder(createElement){
return createElement('h2',
{class:'box'},
['hello vue', createElement('button',['按钮'])])
}
})并把config里面的inedx.js的
useEslint: true改成false,即关掉eslint规范,打包项目npm run dev,打开浏览器。在修改main.js
1
2
3
4
5
6
7
8
9
10
11
12new Vue({
el: '#app',
// components: { App },
// template: '<App/>'
//1.createElement('标签',{标签属性},[''])
netder(createElement){
// return createElement('h2',
// {class:'box'},
// ['hello vue', createElement('button',['按钮'])])
//2.传入组件
return createElement(App)
}再次打包,发现App组件被渲染了。
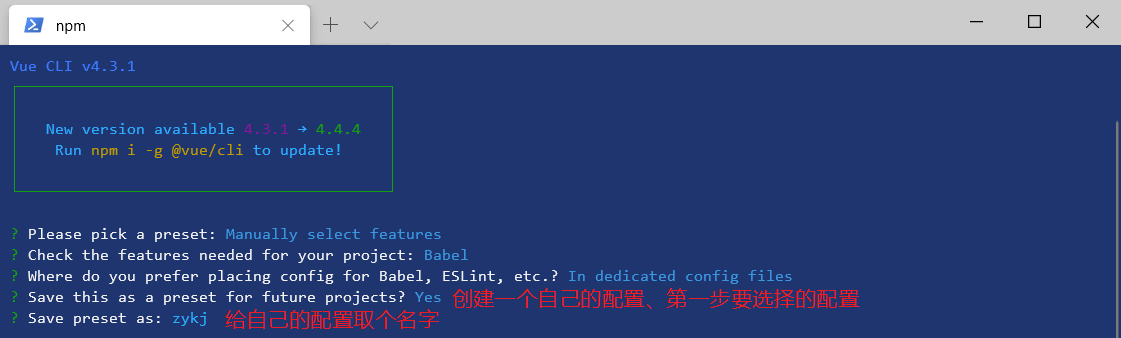
vue-cli4
vue-cli3配置
vue-cli4与2版本区别
- vue-cli3基于webpack4打造,vue-cli2是基于webpack3
- vue-cli3的设计原则是”0配置”,移除了配置文件,build和config等
- vue-cli3提供
vue ui的命令,提供了可视化配置 - 移除了static文件夹,新增了public文件夹,并将index.html移入了public文件夹
创建vue-cli3项目
1 | vue create vuecli3test |
小知识:如果像删除或者添加自己创建项目的配置可以在 C:\Users\Administrator\.vuerc 找到
1 | { |
删除 presets 里的配置就可以了
目录结构:
- public 类似 static文件夹,里面的资源会原封不动的打包
- src源码文件夹
使用npm run serve运行服务器,打开浏览器输入http://localhost:8080/
打开src下的main.js
1 | import Vue from 'vue' |
Vue.config.productionTip = false构建信息是否显示
如果vue实例有el选项,vue内部会自动给你执行$mount('#app'),如果没有需要自己执行。
vue-cli4配置
vue-cli3与vue-cli4配置基本一样。都可以进入图形化界面创建项目。以下以vue-cli4演示:
在创建vue-cli4项目的时候可以使用vue ui命令进入图形化界面创建项目,可以以可视化的方式创建项目,并配置项。
vue-cli4配置被隐藏起来了,可以在node_modules文件夹中找到@vue模块,打开其中的cli-service文件夹下的webpack.config.js文件。
再次打开当前目录下的lib文件夹,发现配置文件service.js,并导入了许多模块,来自与lib下面的config、util等模块
如何要自定义配置文件
在项目根目录下新建一个vue.config.js配置文件,必须为vue.config.js,vue-cli4会自动扫描此文件,在此文件中修改配置文件。
1 | //在module.exports中修改配置 |
反向代理配置
当请求的API有跨域问题时、需要使用代理
例如 我们使用Axios请求Api时
1 | mounted(){ |
就会出现跨域的问题: Response Headers -> access-control-allow-origin:
此时我们需要在根目录创建vue.config.js https://cli.vuejs.org/zh/config/#devserver-proxy
1 | module.exports = { |
修改请求
1 | mounted(){ |
- 支付宝
- 微信